Tuesday, 26 March 2024

Solitary bee observation box build guide

This is a variation on a commercial product that was designed and sold by NurturingNature

https://nurturing-nature.co.uk/product/award-winning-solitary-bee-observation-nest-box/

Its most commonly used (in my garden) by Red Mason bees, various leaf cutter bees and depending on the channel sizes in the inserts some other bee species such as orange vented mason bees and Yellow-faced bees.


There is a pdf version of the build guide here


This product is no longer sold through that website.  I bought my original side view observation box from George some years ago, and have since made more for my own use.  I have omitted the bottom release chamber as I have made my own release boxes that let me watch them hatch which is the best bit!


Build Guide


This is a two-part build.  1) The insert wooden blocks+acrylic sheets, 2) The box itself.  

It’s easier to build the box around the insert, that way you won’t end up with a space too small.  That said, I make sure that the box can accommodate an insert that is 55mm (wide) x 290mm (tall) and 200 mm deep as that fits my inserts, which are mostly the same size.


I make the insert to be not so deep and wide so that it fits in with a slight recess and has a couple of mm either side so it does not get stuck.  I’ve made these boxes from 12mm and 18mm ply, my choice is based on what I find in a skip.


The three examples shown above were made from skip-rescued 12mm plywood.  Measurements are approximate… I have a completed one to hand to double check!


Sides x 2     290mm x 215mm

Top              240mm x 80mm

Bottom        215mm x 80mm

Back            288mm x 56mm (fits into the space between the top, sides and back)


The window inserts are cut out using a jigsaw.

To do that, drill 4 guide holes in a (mostly…) rectangular shape and join the holes with a jigsaw.

I cut mine to approx. 180mm tall x 110mm wide.  Use the cut-out pieces as the window inserts.  


The guide holes are covered with two pieces of ply (called window baton above).  I use thinner ply (10mm) for this as it looks nicer, and also won’t collect as much rainwater.

I made four wooden toggles that hold the window inserts in place.


The parts are joined using wood glue and nails (nail gun).


This is the same box as above but made from 18mm ply / basically whatever bits I had to hand


I also hot-glue a piece of roofing felt on the top with generous overhangs at the sides and front – this limits any water ingress into the sides.


A coat of varnish on the outside will make it last longer

Bee Block Inserts

These are made from a stack of 4 pieces of wood that is 70mm wide, 45mm tall and 185mm deep.  I can get this in 2-meter lengths from my local DIY store then cut the lengths to 185mm pieces.  Since the dimensions of the box itself is governed by this then it’s worth checking you can source it.  Ideally don’t attempt to cut different blocks width blocks to fit as you won’t end up with a neat stack, (I didn’t at least!), instead build the box to suit the dimensions of insert timber that you can reliably source.


Channels

For red mason bees and leafcutters, I use an 8mm router bit cut to a depth between 5-8mm deep.  For later in the summer you can cut smaller channels, I find orange vented mason bees will use 6mm channels and yellow faced bees smaller ones (2-4mm-ish).  


Acrylic  

This is the most expensive part of the build.    I started using 4mm Perspex from the DIY shop cut using my bench saw.    I made ?10 inserts last year so instead I ordered pre-cut pieces: 280mm x 190mm in 3mm ply from https://www.cutmy.co.uk/ , which was a more economical way of doing it.  4mm acrylic would probably be easier to screw together as it’ll accommodate a less precise countersink when it comes to screw it all together.


Filled woodblock Insert with red mason bees and leaf cutter bees, so is probably mid-Summer


Top: Red mason bees (no parasites), Middle: Orange vented mason bees

Bottom: Red mason bees, some + Houdini flies


Release box


The Nurturing Nature version of this observation box has an integral release chamber at the bottom of the box.  This makes the build a bit trickier, I don’t add that and instead make separate release boxes.  These are great as they let me see the bees hatching.  These few examples are recycled from some old shelving units.  The gap at the front lets the bees out.


Batch of release boxes made Spring 2023


Miscellaneous Pics


Monday, 8 November 2021

Live streaming bird box upgrade to Pi Zero v2

The Raspberry Pi Foundation just released an update to the Pi zero W from v1 to v2, see here for full details

I had one of the bird boxes down for some TLC and swopped the v1 for a v2 and did some before / after benchmarks.  I'm most interested in its improved wifi as well as likely faster compute time since it's moved from single core to quad core CPU.  Bear in mind that that these pi zeros are in bird boxes up a tree and rely on nearby wifi signal to operate, so I'm interested in upload speed, the time taken for compute-based tasks and how much heat they generate.  I used benchmark scripts here 


Temperature: It gets hotter! there's a +12 degrees Celsius for the v2 under load.  These units are enclosed in the top portion of a wooden nest box so that extra heat needs to go somewhere.  In a near copy of this box I've installed a vent in the camera section with aluminium grill for ventilation which this one does not have so it'll be interesting to see how much of a difference this makes.


Internet speed test: Download is much faster, however this will be streaming a video signal out, so  any download speed bump isn't going to do much.  There is minimal difference upload speed so I'm not expecting increased streaming bandwidth.  Testing is on the workbench so I cant say if the wifi throughput is different whilst its up a tree.

CPU test: CPU tasks complete much faster.  This matters in my use case since the regular v1 pi zero W suffers from drop in video stream signal when undergoing video encoding, so if there's a bird in the box and the unit is encoding a video the streaming signal may drop leading to temporary loss of signal.


You can see some droppings in this box, so something's been roosting in it.  Once its back up in the next few days and a few repairs are done then hopefully the'll be some more things to report.

For interest, this box came down as non-functional and was found to have a corrupted micro SD card, and a load of the entrance hole sensor connections had corroded away, so its now had some rough and ready emergency soldering, a new SD card and is back working again.  The front piece is missing from this 'behind the scenes' pic  showing my bodgy fixes...


Here is an roosting Great tit who is resting in the #2 version of this box as I write this, but with v1 pi zero w, it'll make for an interesting comparison when #1 goes back up.


Saturday, 18 January 2020

Convert cheap security camera into nature camera

Live-streaming commercial IP cameras can be expensive.  I don't like expensive.

...there are cheap ones, but they're often hard-wired into the 'cloud', and stop you viewing the camera without an internet connection, often requiring more ££/$$ out of you to actually use the camera's full potential.  I'm also not a fan of streaming content 24/7 to an online faceless cloud only to have to download it back again to view it...  </end of rant>

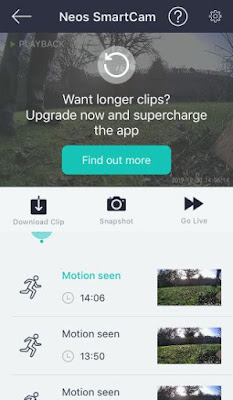
Ryan Fitton's blog describes how a cheap IP security camera, the 'Neos SmartCam' can be simply modified to enable access its local video stream (called an rtsp stream).  We can then do some cool stuff with it to replicate and extend the limited cloud motion detection functionality.  The camera is available from Amazon here.
* 2021 update - it appears that the version available now has had a firmware update such that flashing it with the custom software may not be possible - you may still be able to pick up the original version off ebay *  Its a shame as my modified one has been happily livestreaming from a birdbox for the best part of a year now without issue


The good bits
  • Its a £25 wide angle wifi IP camera.  
  • You can view the livestream locally and remotely (remote needs internet at both sites)
  • It has night and day modes - night mode uses IR leds which are ok over a short distance.  
  • It does motion capture in the cloud
  • There's a smartphone/tablet app that lets you manually record clips live of ?unlimited length.

This is an example of a motion-captured clip on an unmodified camera (note its not waterproof!).

The bad bits
  • Motion capture relies on an active internet connection.
  • Motion capture videos are poorer resolution than manually captured ones.
  • Constant use of your internet connection.
  • Without more ££/$$ you only get 10 second clips that are limited to 10 min triggering interval.
  • The number of clips it saves is limited to maybe the last ?10.   
  • Neos expect a lot of personal info on initial configuration - I don't like that at all.
  • The local video stream, is NOT available.  I tried really hard!
  • 'Full' functionality is only available at extra subscription cost
Neos SmartCam.  They know where you live if you let them.

No Thanks.
So lets's fix it!!

Ryan's blog describes a method to make the video stream accessible locally in the form of an RTSP video stream.  To do this, you replace the camera's on-board software (the 'firmware').  This also removes the the motion capture functionality as this is done on Neos' cloud servers.  The method involves modifying the 'bootloader' to accept alternative firmware when turned on. To do this you need a blank micro SD card and some means to transfer custom firmware called 'DaFang hacks' to the unit.
DaFang hacks is custom firmware which you can flash to the camera via a MicroSD card. This give you benefits such as; no relying on the manufacturer’s cloud services, SSH and FTP services on the camera itself, and the best: RTSP stream support – this will allow you to integrate the camera into any DVR recording software, such as Shinobi, ZoneMinder or Synology’s Surveillance Station
My experience of modifying my Neos SmartCam was pretty simple.  The one difference to Ryan's account is that the 'ready' LED flash pattern on mine was different, showing a solid yellow LED signal. I also used an 8Gb micro SD card instead of a 16Gb one.  I also noticed that every time I used it on the stock firmware, the app kept telling me that it needed a firmware update.  DON'T DO THAT... I suspect that if you do it will remove the possibility of modifying the bootloader so that you can load custom firmware.  I cant prove that as I didn't try it, but its not worth the risk!

So now I have access to a local rtsp video feed from a cheap camera with day & night modes  plus all the camera configuration options 😊.

I modified the settings in the configuration browser as follows to get an acceptable framerate:
Video size: 960x540
Bitrate: 500
Framerate: 25 fps

Some things that you can with do an rtsp video stream:

  1. Motion capture via open-source CCTV application MotionEye on a Raspberry Pi (I do this)
  2. Motion capture using commercial DVR recording stations (I don't do this)
  3. Motion capture using commercial CCTV applications on a PC e.g. iCatcher (I did this).
  4. Local viewing of your camera's video on a PC using VLC 

Local motion capture example using MotionEye
Motion capture done locally that does not rely on streaming to the cloud.  I currently use MotionEye launched from a Docker image on on a Raspberry Pi to motion capture video from this camera.  Its really simple to setup, I will likely do a future post more detail.


Review video stream in a web browser OR livestream to YouTube for free
I've previously done a post about an excellent application called Restreamer. This takes an rtsp stream and outputs it as something that can be easily incorporated into a web browser.  It also allows you to stream directly to YouTube and other streaming providers with minimal effort, see my previous post for more details on this specifically. 

At the moment I'm using Restreamer to generate a video stream from this modified neos camera that I can load it into into my 'Wildlife Camera dashboard', which is one way to get all my cameras onto one screen via a web browser.  This is also possible using MotionEye, however this app can handle either the rtsp feed or the 'web-friendly' one from Restreamer.

Have fun with timelapse 
Once you can access the local video stream this sort of thing becomes a possibility.. coming to a future blog post  😎


Conclusion
Without updating the firmware its pretty much useless for my needs.  The updated firmware opens up all sort of potential, I'm considering where to use it, in an inside situation, maybe a owl box?

Wednesday, 1 January 2020

Restreamer: Live stream an IP camera the easy way

I recently added a wifi IP camera to add to my collection of home-brew wildlife monitoring kit, kindly supplied by Birdsy: https://www.birdsy.com/ .  The Birdsy camera livestreams to the 'cloud' where artificial intelligence (AI) software is used to classify the bird species.  Video clips are saved to your own secure section of the Birdsy website.

BUT I wanted to do more with the video without having to rely on an internet connection via the web site or smartphone app... so I needed access to the local video stream.  I came across a great application called 'Restreamer', which converts the rtsp stream that the camera produces into an internet browser-friendly video stream.    Restreamer is available in a simple to setup Docker image for the Raspberry Pi (or on Windows/Mac etc).  I recently wrote a how-to for Docker setup on the Raspberry Pi here.  In this case I would recommend using a version of the Pi with more oomph, eg the v3 or v4.

Restreamer user interface

Using Restreamer with the IP camera rtsp stream, I have been able to easily...

(1) Incorporate a website-friendly camera feed into my birdbox camera/weather 'dashboard' 
[  *Hint* - it's the top left camera feed  ]...


My 'Wildlife dashboard' incorporates Birdsy video stream via Restreamer, not the rtsp stream sent to the Birdsy servers and pulled back again via the Birdsy website (i'm not sure that's even possible) .

See this post that describes by Grafana wildlife dashboards in more detail.  By including the live, local camera video feed , I'm not reliant on pulling a live feed back off their website.  This does not interfere with normal operation of the Birdsy camera (or any other IP camera at that).  All the bird species AI goodness that Birdsy offers still requires the website login/app.    My dashboard is only available on my local network.

How does this work?... Restreamer converts the local rtsp video stream into a format that the Grafana dashboard can present in an html 'i-frame'. The output from Restreamer is for this Grafana panel is:

<iframe src="http://XXX.XXX.X.XX:9090/player.html" name="restreamer-player" width="704" height="500" scrolling="no" frameborder="0" webkitallowfullscreen="true" mozallowfullscreen="true" allowfullscreen="true"></iframe>

'http://XXX.XXX.X.XX' represents the IP address of the Raspberry pi running Restreamer.  Port 9090 is configured in the docker Restreamer container used to make the birdsy IP camera feed available.  You can spin up as many Restreamer Docker containers as you want, just assign a different port for each camera - instructions on the Restreamer website.

(2) Push the livestream elsewhere... e.g. Stream live to YouTube
A few years ago I live streamed a Robin nest to YouTube using using a program called ffmpeg.  It was a fiddle to setup and involved a long and convoluted command line to run it. If you want to watch four  hours of robin chicks check out this archived link: https://youtu.be/lMOGX1dMaO8


Anyway Restreamer makes to really simple to push the local rtsp stream direct to YouTube, Twitch, Facebook, Vimeo etc (I know what at least two of these are....).  The screenshot below is my Birdsy Camera feed pushed direct to YouTube, however any rtsp camera where you can access the local feed should work equally well.


(3) Push the camera feed into alternative, locally run motion capture software
[ Video clip motion-captured locally using free CCTV  application 'Zoneminder' .  Technically this used the rtsp feed direct from  the camera, and not via Restreamer]

This gif was generated from a Zoneminder-motion captured clip.  I don't recommend Zoneminder as it's user interface is clunky and I found retrieving captured video to be non-intuitive and fiddly. I only used it as there is a Docker container available for the raspberry pi.  Other motion capture software is available, i will do a future post on economical local motion capture options (i.e. not reliant on the cloud and an 'always on' internet connection).

Look a chap in the eye...

Restreamer brief overview
See https://datarhei.github.io/restreamer/

Restreamer takes a variety of video stream sources and converts it into a web browser-friendly format.  For my IP camera it was as simple as entering the IP camera's rtsp stream and pressing Start.

Stream locally and also to external services (Youtube etc) 
It can also take video from IP cameras, USB cameras, Raspbery PI cameras

For an IP camera, the format is:  rtsp://username:password@Camera'sIPaddress:port/streamLocation
The username and password can be found in your camera's literature (be sure to change it...)
I located the IP address and rtsp stream location of my Networked IP camera using a windows program called IPCManager, this gives access to loads of behind the scenes camera configuration options.

The instructions for adding a Restreamer container to Docker can be found here:
https://datarhei.github.io/restreamer/docs/installation-linux-arm.html
I'm running it on the fastest Raspberry Pi currently available (Pi 4) with 4Gb ram - as I dont want this to be a bottleneck.  There are Docker images available to run in Windows or Linux Docker installations too.

Next job is to look at options for local motion capture, probably starting with Docker applications on my trusty Raspberry Pi

Thursday, 26 December 2019

BirdBox entrance counter v3: postgres / docker / python

This post describes the software side of my v3.0 birdbox entrance hole implementation, refer to part 1 related post  for the physical build details.  To log activity, I used a basic Postgres database, which (to continue an ongoing theme) is run in a docker container to simplify setup.  I updated the python logging script to log to a database rather than a text file, and corrected some previous errors along the way...

The existing birdbox setup remains the same, its a Raspberry Pi ZeroW running Pikrellcam for motion detection and auto capture.  The LED illumination, IR cut and RasPi IR camera module etc remain unchanged.

Like before.. but with entrance hole activity logged to a database

v3.0 entrance hole counter updates...
The two other boxes that I have 'in the wild' with entrance hole counters log partial and full 'in' vs 'out' events activity to a text file.  This updates (v3.0) to a Postgres database instead.  Using a database rather than a text file opens up more possibilities, in particular allowing collected data to be accessed remotely.  I plan to pull data off for analysis on a separate machine, for example to populate activity plots on my grafana nestbox CCTV-sytle dashboard.  Having the activity data sitting in a database makes this much easier.  I've used a 'dockerised' version of postgres as its simpler to setup than installing it from scratch.

This post will cover
1) Docker Installation
2) Docker-Compose Installation
3) Add Postgres container to  Docker installation
4) Creation of a database to log activity
5) The activity logging script itself

I use a base image of Raspbian 'Lite' to start off.  This takes up less space on the SD card but may need more things installing along the way than than 'full-fat' version.  You can follow these setup steps on a Raspberry Pi ZeroW, but be prepared to wait a long time for some of them (especially for Docker Compose).  I use a spare Pi 3 or 4 for the build (much quicker) and transfer the sd card over to a Zero W when its done.  The installtion Pi is assumed to be networked. There's about a zillion how-tos online for that.

1) Docker installation

Think of Docker as an empty applications box.  Once Docker is running there are many many pre-configured applications than can be (fairly) effortlessly run without having to do lots of fiddly setup...

This is mostly lifted from these sites, with my comments added:

Install commands (I left my hashed-out comments in)
sudo apt-get install apt-transport-https ca-certificates software-properties-common -y
curl -fsSL get.docker.com -o get-docker.sh && sh get-docker.sh
sudo groupadd docker  #not actually required, groupadd: group 'docker' already exists
sudo gpasswd -a $USER docker
newgrp docker #avoids reboot
docker run hello-world  #test that it works

If it all works, you get the following message:
Hello from Docker!
This message shows that your installation appears to be working correctly. 
Run Postgres on Docker
Details here: https://dev.to/rohansawant/spin-up-a-postgres-docker-container-on-the-raspberry-pi-in-2-minutes-2klo and https://dev.to/rohansawant/installing-docker-and-docker-compose-on-the-raspberry-pi-in-5-simple-steps-3mgl

2) Docker-Compose Installation

Install proper dependencies:
sudo apt-get install libffi-dev libssl-dev
sudo apt-get install -y python python-pip  #?had issue with python 2.7.13 not being compatible with the version of docker-compose below
#edit 
sudo apt-get install -y python3 python3-pip

sudo apt-get remove python-configparser

Install Docker Compose

#sudo pip install docker-compose #takes a long time on a Pi ZeroW
# edit 12/2/21
sudo pip3 install docker-compose
#see details here

3) Add a Postgres database container to Docker:

See https://github.com/CT83/Raspberry-Pi-PostGres-Docker-Compose
Note, MySQL is another option, there are MySQL images available on Docker, or maybe install from scratch.  I went with Postgres as I like pgAdmin as a sql interpretor.

# clone the repo which contains the Compose file: 
git clone https://github.com/CT83/Raspberry-Pi-PostGres-Docker-Compose.git
# Up the container:  
cd Raspberry-Pi-PostGres-Docker-Compose
sudo docker-compose up --build -d
# note this returns an error for a file it cant find:
# ERROR: Couldn't find env file: /home/pi/Raspberry-Pi-PostGres-Docker-Compose/.env
# fix this by making a dummy file first:
touch .env  
# then re-run
sudo docker-compose up --build -d

All being well, postgres database should be running in a docker container on the host Pi, on the default port (5432).   As-is the default user is postgres, password is password@7979  You can change these in the docker-compose.yml.

pgAdmin is a handy sql interpretor/tool for managing local or remote postgres databases.  Install it on a networked PC and you should be able to remotely connect to the postgres instance running on the Pi created above.  See https://www.pgadmin.org/.  Google for loads of tutorials around this bit.

4) Creation of a database to log activity

Within pgAdmin (on a remote PC), this sql command should make the necessary database and table within it

CREATE DATABASE db_activity
    WITH 
    OWNER = postgres
    ENCODING = 'UTF8'
    LC_COLLATE = 'C.UTF-8'
    LC_CTYPE = 'C.UTF-8'
    TABLESPACE = pg_default
    CONNECTION LIMIT = -1;

CREATE TABLE public.entrance_log
(
    sensor integer,
    state integer,
    event_time timestamp without time zone
)
WITH (
    OIDS = FALSE
)
TABLESPACE pg_default;

ALTER TABLE public.entrance_log
    OWNER to postgres; 

I'm starting basic, so there's only only one table, for the entrance hole activity.

5) The activity logging script

This is written in Python.  Need to install some extra python packages first:
#install the postgres/sql connector psycopg2
pip install psycopg2  #it does not work properly, need to run the following command first:
sudo apt-get install libpq-dev #(suggestion here: https://github.com/psycopg/psycopg2/issues/699)

The following python script creates a entry in the db_activity database in a table called entrance_log.

A simple bird  'head bob in' event breaks the outer beam[1,0], then the inner beam [2,0],  then withdraws: Inner beam whole again [2,1], then outer beam whole [1,1].
Note that in this example, Outer beam = 1, Inner beam = 2, Broken = 0, Whole = 1

Database entry
This above event as recorded in postgres database

I added some error checking code to stop the script from crashing out if a beam is triggered and it cant see the postgres database for whatever reason - it will carry on merrily logging to file instead.
I have left in the 'log to file' functionality as a backup, I'll may remove that eventually, its there as a backup.

The above event as logged to a txt file
Input comes from two GPIO input pins from the entrance hole sensor: pin 22 (outer beam) and pin 23 (inner beam).  Other pins are available....

HoleSensor.py
import RPi.GPIO as GPIO

from time import sleep

#postgres error handling from here: https://kb.objectrocket.com/postgresql/python-error-handling-with-the-psycopg2-postgresql-adapter-645
#postgres add record adapted from here: https://pynative.com/python-postgresql-insert-update-delete-table-data-to-perform-crud-operations/

# import sys to get more detailed Python exception info
import sys
# import the connect library for psycopg2
from psycopg2 import connect
# import the error handling libraries for psycopg2
from psycopg2 import OperationalError, errorcodes, errors
# import the psycopg2 library's __version__ string
from psycopg2 import __version__ as psycopg2_version

from datetime import datetime

# Change log
# 16/09/19 updated for zerocam 7
# 14/12/19  modified to write activity to a local postgres database, database implemented in docker
#           postgres error handler added so the script does not crash out if the database isnt available for whatever reason

GPIO.setmode(GPIO.BCM)          #use BCM pin numbering system
GPIO.setwarnings(False)

whichBirdcam = 'zerocam6'

#file used to log entrance actions
EntrancelogFile='/home/pi/zerocam6/logs/'+zerocam6_birdlog.txt'
OpenEntrancelogFile= open(EntrancelogFile,  'a', 0)

#function to return the current time, formatted as
# e.g. 13 Jun 2013 :: 572
def getFormattedTime():
    now = datetime.now()
    return now.strftime("%d %b %Y %H:%M:%S.") + str(int(round(now.microsecond/1000.0)))
    #note that this does not work correctly, as rounding 040 will give 40, but this modified function is only meant as a backup for the local file log

# ********* postgres stuff

# define a function that handles and parses psycopg2 exceptions
def print_psycopg2_exception(err):
    # get details about the exception
    err_type, err_obj, traceback = sys.exc_info()

    # get the line number when exception occurred
    line_num = traceback.tb_lineno

    # print the connect() error
    print '\n' "psycopg2 ERROR:", err, "on line number:", line_num
    print "psycopg2 traceback:", traceback, "-- type:", err_type

    # psycopg2 extensions.Diagnostics object attribute
    print '\n' "extensions.Diagnostics:", err.diag

    # print the pgcode and pgerror exceptions
    print "pgerror:", err.pgerror
    print "pgcode:", err.pgcode, '\n'

def logEntranceEventPostgres(sensor, state):
    dt = datetime.now()  #set the census datetime for the event

    try:

        conn = connect(
            dbname = "db_activity",
            user = "postgres",
            host = "127.0.0.1",
            password = "password@7979")

    except OperationalError as err:
        # pass exception to function
        print_psycopg2_exception(err)

        # set the connection to 'None' in case of error
        conn = None

    # if the connection was successful
    if conn != None:

        # declare a cursor object from the connection
        cursor = conn.cursor()
        print "cursor object:", cursor, '\n'

        #dt = datetime.now()
        cursor.execute('INSERT INTO entrance_log (sensor,state,event_time) VALUES (%s,%s,%s)', (sensor,state,dt,))
        conn.commit()
        count = cursor.rowcount
        print count, "record(s) inserted successfully into entrance_log table"

        # close the cursor object to avoid memory leaks
        cursor.close()

        # close the connection object also
        conn.close()

    #append the same timestamp data to file for good measure
    #formattedTime_old = dt.strftime("%d %b %Y %H:%M:%S.") + str(int(round(dt.microsecond/1000.0)))  #note that this is NOT correct since it 'rounds' a 041ms to 41
    formattedTime = dt.strftime('%d %b %Y %H:%M:%S.%f')[:-3]  #this works correctly
    #write to file until we figure out if the same data is being captured
    OpenEntrancelogFile.write(str(sensor) + "," + str(state) + "," + formattedTime + "\n")

#setup GPIOs
detect_OUTER = 22 #6    #set GPIO pin for Outer photransducer (input)
detect_INNER = 23 #12    #set GPIO pin for Inner photransducer (input)

print 'detect_OUTER = ' + str(detect_OUTER)
print 'detect_INNER = ' + str(detect_INNER)

#Constants
#OUTER_BEAM = 1
#INNER_BEAM = 2

#WHOLE = 1
#BROKEN = 0

# setup GPIO pins:
GPIO.setup(detect_OUTER, GPIO.IN)   #set Outer GPIO Phototransducer as input
GPIO.setup(detect_INNER, GPIO.IN)   #set Inner GPIO Phototransducer as input


#indicate the point the program started in the log
OpenEntrancelogFile.write("### recordBird_v3 starting up at:" + getFormattedTime() + "\n")
print "============================================"
print whichBirdcam.upper() + ": Starting up entrance hole counter script..."
sleep (0.5)

#Set initial state of WasBroken for both beams:
OUTER_WasBroken = False
INNER_WasBroken = False

# LED status check
# LEDstate= GPIO.input(detect_INNER)

print ""
print "detect_OUTER status = " + str(GPIO.input(detect_OUTER))
print "detect_INNER status = " + str(GPIO.input(detect_INNER))
print ""


#When the detector          'sees' IR led, the detector pin is 0/LOW/False
#When the detector does not 'see ' IR led, the detector pin is 1/HIGH/True

def checkStatus():
    if GPIO.input(detect_OUTER):  #if OUTER detector does not see IR led, print error, GPIO.input = HIGH
        print "OUTER beam detect failure!, status = " +str(GPIO.input(detect_OUTER))
        #quit()
    else:
        print "OUTER beam detect - passed :) | Status = "+str(GPIO.input(detect_OUTER))

    if GPIO.input(detect_INNER):  #if INNER detector does not see IR led, print error, GPIO.input = HIGH
        print "INNER beam detect failure!, status = " +str(GPIO.input(detect_INNER))
        #quit()
    else:
        print "INNER beam detect - passed :) | Status = "+str(GPIO.input(detect_INNER))
        print "============================================"
        print ""

def status2():

    print "============================================"
    print "OUTER_IsWhole = "+str(OUTER_IsWhole)
    print "OUTER_WasBroken = "+str(OUTER_WasBroken)
    print ""
    print "INNER_IsWhole = "+str(INNER_IsWhole)
    print "INNER_WasBroken = "+str(INNER_WasBroken)
    print "============================================"
    print ""

checkStatus()

# (x,y)
#  x=beam   (1=Outer,2=inner)
#  y=state  (1=Whole,0=Broken)

while (True):
    OUTER_IsWhole = (GPIO.input(detect_OUTER) == 0)  #read current state of beam
    INNER_IsWhole = (GPIO.input(detect_INNER) == 0)  #read current state of beam
    #print ""
    #print "INNER BeamIsWhole = " + str(INNER_IsWhole)
    #print "OUTER BeamIsWhole = " + str(OUTER_IsWhole)

    sleep(0.05)

    if (not OUTER_IsWhole and not OUTER_WasBroken): #if OUTER beam is broken [FALSE], and OUTER_WasBroken=FALSE (ie default value)
        #GPIO.output(greenLED, 1) #greenLED output to HIGH
        OUTER_WasBroken = True
        print "(OUTER,Broken)"+ getFormattedTime()
        status2()
        #logEntranceEvent(1,0)
        logEntranceEventPostgres(1,0)

    if (OUTER_IsWhole and OUTER_WasBroken): #if Outer beam is whole [TRUE] and OUTER_WasBroken=TRUE
        #GPIO.output(greenLED, 0) #greenLED output to LOW
        OUTER_WasBroken = False
        print "(OUTER,Whole)"+ getFormattedTime()
        status2()
        #logEntranceEvent(1,1)
        logEntranceEventPostgres(1,1)

    if (not INNER_IsWhole and not INNER_WasBroken): #if INNER beam is broken [FALSE], and INNER_WasBroken=FALSE (ie default value)
        #GPIO.output(redLED, 1) #redLED output to HIGH
        INNER_WasBroken = True
        print "(INNER,Broken)"+ getFormattedTime()
        status2()
        #logEntranceEvent(2,0)
        logEntranceEventPostgres(2,0)

    if (INNER_IsWhole and INNER_WasBroken): #if INNER beam is whole [TRUE] and INNER_WasBroken=TRUE
        #GPIO.output(redLED, 0) #redLED output to LOW
        INNER_WasBroken = False
        print "(INNER,Whole)"+ getFormattedTime()
        status2()
        #logEntranceEvent(2,1)
        logEntranceEventPostgres(2,1)

GPIO.cleanup()

To make this script run in the background, add an entry to /etc/rc.local as follows:

# open a text editor in the command window
sudo nano /etc/rc.local


# after this section in the rc.local file 
_IP=$(hostname -I) || true
if [ "$_IP" ]; then
  printf "My IP address is %s\n" "$_IP"
fi

# add the following
python /home/pi/zerocam6/HoleSensor.py &


Saturday, 21 December 2019

Birdsy - Monitor wildlife and auto classify bird species

I recently added a wifi IP camera to add to my collection of home-brew wildlife monitoring kit, kindly supplied by Birdsy: https://www.birdsy.com/ .  This IP camera livestreams to the 'cloud' where artificial intelligence (AI) software is used to classify the bird species.  Video clips are saved to your own secure section of the Birdsy website...

Here is a screenshot of some recent captures off my Birdsy webpage:
A selection of captured, species classified clips as presented on the Birdsy webpage
You can that the bird AI is fairly good, it struggles with non-avian species, but given the company is called 'Birdsy' we can let that go...

As with many internet CCTV streaming applications you can review your live camera from anywhere with internet access and a web browser or via a dedicated phone app.  I can now watch my camera live at work too now...

My Birdsy camera setup
The 'value add' is its auto species classification, which is prett neat.  This is the first Goldfinch it classified, I downloaded it direct from the Birdsy website and uploaded to YouTube:


A mouse or two regularly compete with a Robin, the most frequently classified visitor.


As most people will set this up outdoors, you'll need a decent outdoors wifi connection, and access to a power socket.  I've run a 10m DC extension cable to reach the nearest plug socket (amazon link here).  I already have good wifi coverage outside for half a dozen or so other home-brew cameras.

10m 12v extension cable

The Birdsy camera is configured fairly easily via a smartphone/tablet app. You can dial up or down the resolution of the videa stream, presumably to adjust for better/poorer  wifi signals.

It *is* possible to run this with a dedicated wired ethernet connection, this would require either an additional network cable to be run, or once PoE (power over ethernet) setup with the network and power split out (power dropped to 12v) at the camera end.

Here is a screenshot of the configuration app:


IP camera vs home brew
Until recently, all my nature-watching has been with home-made setups using a Raspberry Pi as a processing unit, with either an attached webcam or raspberry pi camera module (or both).  A cursory glance around the web will find many people using IP cameras like this one from Birdsy instead... so what's the difference?

An IP camera, or 'Internet Protocol' camera is an all-in-one device that connects to a wired or wireless network and generates a video stream.  Camera configuration is usually achieved via a smartphone/tablet app or web browser interface.  The camera itself usually does not deal with video storage or motion capture (I'm oversimplifying, as some do bits of both).  They exist to provide a video 'stream' to some other application, e.g. CCTV motion capture software, and/or dedicated storage device, eg a digital video recorder/DVR.  IP cameras often have built in day/night modes, infra-red cut switching (IR cut) and often an integrated microphone.  They also tend to be expensive.

Most of my home made kit is Raspberry pi minicomputer with attached camera module (like the camera bit from your mobile phone).  All of the functionality mentioned above is possible but require fiddly configuration, the addition of extra components, e.g.illumination, IR cut, microphone and some programming (depending on your aims this may be minimal).  While more fiddly and requiring more technical insight, this approach costs a lot less to setup.

The cool thing about the Birdsy camera, isn't the camera, its the cloud-based image recognition system that categorises the bird video clips based on bird species being filmed.  Given that I get a lot of non-avian species I'm hoping that the AI algorithm will be extended to include non-avian species.  I'm sure there are research applications to auto identification of bird species.

As this is the first dedicated IP camera I've had to play with I plan on investigating other creative things than can be done with the video stream, so more at a later date..