We've rescued several queen bumblebees from the shed over the last few weeks - which reminded me to complete our bumblebee nest box project, which has been sitting unfinished on the workbench over the winter...
Last season, we found two bumblebee nests, the first under a tiled roof, which survived the season, and a second, in an old badger excavation hole behind the shed.
I thought the 'Badger-hole' nest looked to be a fairly vulnerable, so in true nature 'tooth and claw' I setup my trail camera to see if anyone else also thought so... Pending something dramatic happening to my roof, the first one stood a much better chance of survival.
and, low and behold, along came a badger:
Our solution for this years' bumblebee queens who I keep evicting from my shed, looks like this:
I recently went looking for an old nest box had fallen from its tree. A bit of poking about in the undergrowth located it... plus a pair of nesting robins, sitting on eggs.
So we have a robin nesting on the ground in a broken old nest box, and quite vulnerable in my opinion. In an effort to make it a bit more robust I've put some temporary 'anti-cat' protection around it. I also popped a webcam in (operation of approx 1 minute). I'm a bit concerned the nest is still fairly vulnerable, but at least I've warned the kids off that bit of the garden, explaining that to the dog was a bit trickier. Some more robust anti-cat measures will go up over the Bank Holiday weekend... any way here she/he is:
29/04/17: 9 days old
We definitely have three chicks. I came across this interesting RSPB information page on the nesting habits of robins. Three would seem to be a relatively small clutch size, but our lot seem to have read the manual since eyes started opening on about day 5. All have their eyes open now (when they're not sleeping). Until yesterday, one parents sat on the chicks with the other one feeding, but that has stopped now, presumably they're both busy collecting food. Since the parents dash in and out to feed, its difficult to see what they're feeding, but we've definitely graduated from spiders to big fate white things (cant tell what they are).
1) Day 7 feeding
2) Day 9 feeding, and removal of faecal sac
03/05/17: 13 days old
Looking a bit more like proper birds now. Are starting to take an interest in their surroundings, eg picking off insects that wander too close to the nest. Adults feeding approx every 4 minutes.
Day 8
Day 9
Day 13
The dramatic end to this nest is described in this post
How this was setup....
My rough-and ready solution to documenting this is a LifeCam studio webcam (higher res/better low light than its LifeCam Cinema sibling). This camera has up to now been monitoring the rabbit shed, so it was simple to move it. Handily, the nest box is adjacent to the shed with power and network access (who dosen't?). A quick network cable run to a 'stand-by' raspberry Pi + PoE splitter meant that I could house the bulk away from 'Robbie' the Robin (name was not my choice), to minimise any disturbance. Video capture is using iCatcher console CCTV software
Robin nesting in old,. broken nest box
The Robin box is behind the upturned pot (enlarged on inset). Electronics are housed in the box attached to the pergola (another re-purposed bird box). I've done a bit of waterproofing with electric insulation tape to protect the webcam . The original entrance hole is facing to the right (not used), with robin access through some other animal-caused damage to the lid region.
SO, fingers crossed, with a bit of help this family will make it through. Of concern is all the cats, badgers, rats and mice that I've filmed on my trail camera in this exact spot...
Techy bits
Motion jpeg streaming from a compatible usb webcam guide here via a raspberry pi.
This uses an original Type B raspberry Pi. I had to fix the focus as it wants to focus just behind the bird's head, which isn't very helpful
Code to fix the focus on Raspberry Pi.. Enter the following in a terminal window
sudo apt-get install uvcdynctrl # install package to control USB webcam
uvcdynctrl -v -d video0 --set='Focus, Auto' 0 # turn autofocus OFF
uvcdynctrl -v -d video0 --set='Focus (absolute)' 35 # fixed focus position
...more on controlling auto focus of usb webcams here
The Pi gets its power via power over ethernet (PoE) to my house (via shed). Video stream is captured at iCatcher console on a PC as follows: On new camera setup, select 'Network Device', and enter 'Source' as follows, replacing xxx.xxx.x.xx:yyyy with the IP address and port of the Raspberry pi in the custom feeds dialogue box:
mjpg://xxx.xxx.x.xx:yyyy/?action=stream
I get approx 10fps at 1280x1080, which isn't bad and makes for some some nice screen grabs. 20 fps at 800x600 is also possible, but I've opted for higher res, lower framerate.
So why not use a Raspberry pi camera module? Several reasons...
This was quick to do with minimal disturbance as I could locate the Pi far away from the nest. Rasp Pi camera cables are not very long, and more fragile than a standard USB cable.. I can access the Raspberry Pi + its power gubbins without going too near the nest.
The low light performance of the PiCamera is AWFUL. I have recently installed one of the new v2 camera modules in a custom designed box with its own lighting rig (incidentally is just above this old broken, occupied box!), and have struggled with illumination.
Pi Camera module is not robust, and likes to fry itself it you handle it without taking extreme care to earth yourself first.
raspI camera has its plus points, and is good in an enclosed, pre-planned situation. Its also cheaper than this webcam (off the shelf.. this webcam was an ebay bargain)
So fingers crossed we make it to the weekend and I can properly fence it off, in the meantime we're watching with interest...
Post Easter weekend...
While not especially pretty, the robins don't seem to mind this attempt to put off the local fox/cat/badger population
Livestream setup
I'm running ffmpeg on a second Pi which takes the video stream from the Pi attached to the pergola in the pic above, adds in a dummy audio stream to play nicely with YouTube, flips the image (camera is upside down), and reduces the width to 720 (scaled) and streams in appropriate format to YouTube. I've anonymised it by removing its local IP address and my YouTube streaming ID. The second Pi wasn't doing much anyway, and lives in a currently vacant birdbox.
I'll expand on this in a bit more detail in a separate post, but the command is as follows:
Our 2017 double-camera bird nestbox went up a couple of
weeks ago. This is a two-camera setup
built around a conventional wooden box design... with a Raspberry Pi 3 for a
brain. The box gives a day and night (infra-red
/ IR) video options (e.g. to check for roosting at night), with separate 'from
above' IR and 'from the side' daylight cameras.
It has a temperature, humidity and ambient light sensors, the latter to automate
interior illumination with either visible light or IR leds, all of which have
high and low settings. It's connected
directly to the local network so all video storage is handled off-box (as it
were). All we need now is some birds...
2017 double camera bird box
Components
Brain: RaspberryPi 3. Most of the electronics gizmos
interface via a female to male header + perfboard 'shield' that plugs into the
GPIO header pins of the raspberry pi.
Power: This is via Power-overEthernet (PoE) using this TP-LinkPoE kit (~£20). This allows one cable for power and network access, and provides a 12v feed for the LED illumination and IR-cut,
which is also dropped to 5v for the Raspberry Pi using a RECOMR-7885.0-1.5 module (~£10)
Top-down camera (Cam
-1): InfraRed Raspberry Pi v2 camera module (~£22.79). This does higher resolution, fixed focus motion-activated
video and image capture, using the excellent PikrellCam
software. Video is saved direct to my local
network to overcome local storage issues.
InfraRed cut-out
filter: This switches a filter in
front of Cam- ( the Pi v2 IR camera), in the daytime for normal-looking daytime
images a and video. In low light/dark,
the IR filter is pulled back and IR led array activated for unobtrusive night
viewing. this is interfaced to the Pi's GPIOs via an L2930NE ic.
Side-view camera
(Cam-2): MicrosoftLifeCam Cinema (~£15 ebay). This is
the 'dumb-camera', and just generates a video stream that is monitored by a windows
PC running iCatcher
CCTV software.
Illumination: There
are 3 lighting circuits, (1)3x 'White' leds recycled from a broken torch, (2)4x
'Warm' leds (from the 'drawer of stuff'),
(3) an 36 LED IR led. The latter is
coupled to a 5k variable resistor as full power causes a white-out. These three lighting options work off the 12v
feed and have low and high settings. The
12V LED circuits are switched by the Pi's GPIO pins via a ULN2003AN ic. I used some different types of LEDs since I
didn't know what would work the best ultimately.
IR array
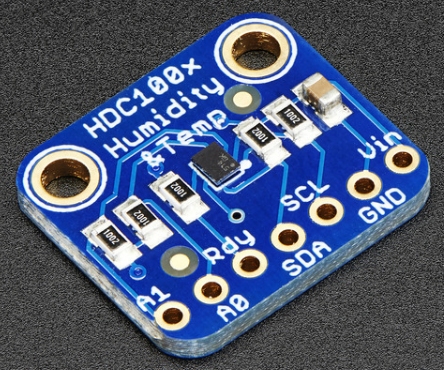
Temperature and
Humidity: HDC1008 I think these are now discontinued, but as
this was 'in the drawer of stuff', in it went. This
sits in a separate, vented compartment and logs outside temperature and humidity
to a MySQL database.
Entrance hole counter:
The box has a 25mm entrance hole, with in outer and inner IR detector beam,
as such we can distinguish between entering/exiting/head pop in/head pop out.
see these updated posts for a 2019 version of the entrance hole counter: http://nestboxtech.blogspot.com/search/label/EntranceCounter
Other stuff: I've also added inside and outside PIRs as
an alternative way of measuring activity - but haven't worked this bit up yet...
It's built in a modular fusion so that it can be
relatively easily dismantled. The
circuitry for the entrance counter is housed separately, into a compartment in the front panel of the
box, and connected via a hacked cat5 cable and jack to the Pi shield.
Some pictures...
Easy access side door.
Showing position of side camera and opaque windows for illumination
The main box area is under the wiring bit, with glass partition separating webcam section
Raspberry Pi Shield in detail
One of two vents for the HDC1008 temp and humidity sensor
In situ
As I develop more of the software side of things I'll post updates at intervals.