Our 2017 double-camera bird nestbox went up a couple of
weeks ago. This is a two-camera setup
built around a conventional wooden box design... with a Raspberry Pi 3 for a
brain. The box gives a day and night (infra-red
/ IR) video options (e.g. to check for roosting at night), with separate 'from
above' IR and 'from the side' daylight cameras.
It has a temperature, humidity and ambient light sensors, the latter to automate
interior illumination with either visible light or IR leds, all of which have
high and low settings. It's connected
directly to the local network so all video storage is handled off-box (as it
were). All we need now is some birds...
 |
| 2017 double camera bird box |
Components
Brain: RaspberryPi 3. Most of the electronics gizmos
interface via a female to male header + perfboard 'shield' that plugs into the
GPIO header pins of the raspberry pi.

Power: This is via Power-overEthernet (PoE) using this TP-LinkPoE kit (~£20). This allows one cable for power and network access, and provides a 12v feed for the LED illumination and IR-cut,
which is also dropped to 5v for the Raspberry Pi using a RECOMR-7885.0-1.5 module (~£10)

Top-down camera (Cam
-1): InfraRed Raspberry Pi v2 camera module (~£22.79). This does higher resolution, fixed focus motion-activated
video and image capture, using the excellent PikrellCam
software. Video is saved direct to my local
network to overcome local storage issues.

InfraRed cut-out
filter: This switches a filter in
front of Cam- ( the Pi v2 IR camera), in the daytime for normal-looking daytime
images a and video. In low light/dark,
the IR filter is pulled back and IR led array activated for unobtrusive night
viewing. this is interfaced to the Pi's GPIOs via an L2930NE ic.

Side-view camera
(Cam-2): MicrosoftLifeCam Cinema (~£15 ebay). This is
the 'dumb-camera', and just generates a video stream that is monitored by a windows
PC running iCatcher
CCTV software.
Illumination: There
are 3 lighting circuits, (1)3x 'White' leds recycled from a broken torch, (2)4x
'Warm' leds (from the 'drawer of stuff'),
(3) an 36 LED IR led. The latter is
coupled to a 5k variable resistor as full power causes a white-out. These three lighting options work off the 12v
feed and have low and high settings. The
12V LED circuits are switched by the Pi's GPIO pins via a ULN2003AN ic. I used some different types of LEDs since I
didn't know what would work the best ultimately.
 |
| IR array |
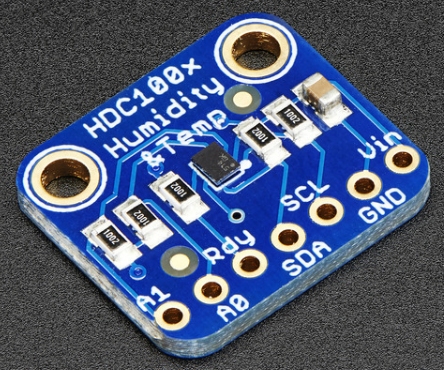
Temperature and
Humidity: HDC1008 I think these are now discontinued, but as
this was 'in the drawer of stuff', in it went. This
sits in a separate, vented compartment and logs outside temperature and humidity
to a MySQL database.
Entrance hole counter:
The box has a 25mm entrance hole, with in outer and inner IR detector beam,
as such we can distinguish between entering/exiting/head pop in/head pop out.
see these updated posts for a 2019 version of the entrance hole counter:
http://nestboxtech.blogspot.com/search/label/EntranceCounter
see these updated posts for a 2019 version of the entrance hole counter:
http://nestboxtech.blogspot.com/search/label/EntranceCounter
Other stuff: I've also added inside and outside PIRs as
an alternative way of measuring activity - but haven't worked this bit up yet...
It's built in a modular fusion so that it can be
relatively easily dismantled. The
circuitry for the entrance counter is housed separately, into a compartment in the front panel of the
box, and connected via a hacked cat5 cable and jack to the Pi shield.
Some pictures...
 |
| Easy access side door. |
 |
| Showing position of side camera and opaque windows for illumination |
 |
| The main box area is under the wiring bit, with glass partition separating webcam section |
 |
| Raspberry Pi Shield in detail |
 |
| One of two vents for the HDC1008 temp and humidity sensor |
 |
| In situ |
As I develop more of the software side of things I'll post updates at intervals.
Wow! very nice. Another super-neat wiring/construction job ...compared to my Shabby (not-so) Chic monstrosities. You have certainly packed a lot of tech into this one.
ReplyDeleteAs your Pi is POE, how do you stream the second camera back to base? Or is this just connected to a Pi USB socket?
I couldn't find a proper spec on the IR cut unit, but it looks like it may draw quite a high current (maybe a couple of hundred mA). I guess thats not a problem as you are using POE.
Due to a technical blunder, my Pergola box stopped working about a week ago. It would run motion for a couple of minutes, before the Picaxe switched off the power due to lack of feedback from the Pi. I could ping the Pi but not VNC or SSH into it.
Once I took the SD card out it was clear that it was completely full, so Pi could not boot into desktop.
Some idiot (...OK, ...it was me) forgot to clear out the video clips (which really needs to be done once a week) so my 16GB SD was soon full!
The blue tit female has pretty much finish the nest, so I'm expecting her to start sleeping in the nest any time soon.
Raspi Cam works via Pikrellcam, with video saved directly to a mapped network drive, so I'll never run out of space (well, will eventually, but have >500Gb free atm ;)
DeleteThe mjpeg stream is created in software via the usb webcam using mjpg_streamer, and streams across the network. Cam 1 does not really stream, only when it's viewed, cam 2 (webcam) streams all the time. I have a RasPi model A running Pikrellcam that constantly fills up (64Gb micro-sd card), so I appreciate your problem. I dont know a lot about current loads for the IR cut, I couldn't find the eact same model from 'GenericChina.com', but it is powered vis the Pis 5V feed. The only other thing powered directly from the Pi is 2 IR leds that do the entrance counter, so hopefully I'll get away with it. Incidentally, the IR cut also works fine off the 12V feed.
Re the other nest site, unfortunately our blue tits have abandoned it for the more salubrious accommodation of my neighbour...
Really nice system ! I'm really impressed. I'm planning to run the same kind of project to realize a RPi trailcam and you used mostly all the elements I want to implement in my system : IRCam, IR cut-out filter and illumination (except I'd like to use -and find- a 940nm LEDS array). I'll probably use a battery system, IR motion sensor and wifi. Is it possible to ask you help when my project will be more advanced (especially regarding the IR filter) ? I didn't know about Pikrellcam software and it sounds really promising for my project.
ReplyDeleteOnce again, really good job.
Really good job !
This is amazing! I feel a bit intimidated but such a good set up (dual camera!) that I feel inspired.
ReplyDelete